
Filter and export a report
Choose the period and people you need, then export the same filtered results shown on screen.
What this guide helps you do
Every report follows the same steps: set the filters, review the table, then download a CSV or print the report. Downloads and print views use the same filters and calculation rules as the screen.
Start by deciding the exact question: one date, a date range, a leave year, a payroll year or a comparison month. Similar-looking date controls answer different questions.
Choose the right period
As at shows the situation on one date. Headcount uses it so the report reflects who was employed on that date, even if employment changed later.
From and To include records within a date range. The report note says whether that means an employment event, leave day, expense date or payslip payment date.
Leave year uses the company’s leave-year boundary because entitlement and carry-forward belong to that year.
Payroll year uses the company’s separate payroll-year boundary for year-to-date earnings.
Month is used when one payroll month must be compared with the previous month.
An invalid date or a To date before From is marked beside the field. HRStuff shows no result until the question is valid, so an old table cannot be mistaken for the new answer.
Narrow the people and records
Department includes records in the selected department within the report’s allowed scope.
People lets you choose one or several named employees where the report supports it. A manager is offered only their direct reports.
Employment type narrows Headcount to the chosen type.
Employment status defaults to Active on reports that support it. Choose All when a historical answer should include people who have left.
Include draft payslips adds unfinished payslips to the report. Leave it unselected when you want published payroll only.
Run and review the report
Set the filters
Change only the controls needed for the question. Choose Update report or Show, depending on the report.
Read the heading and summary
Confirm the period, scope, currency and any headline figures. A missing month is not the same as a zero-value month.
Read the note and warnings
The method note explains how records were selected and calculated. Resolve missing salaries, mixed currencies or balance warnings before using a total.
Check the table and total
Spot-check individual rows against the source employee, leave, claim or payslip record.
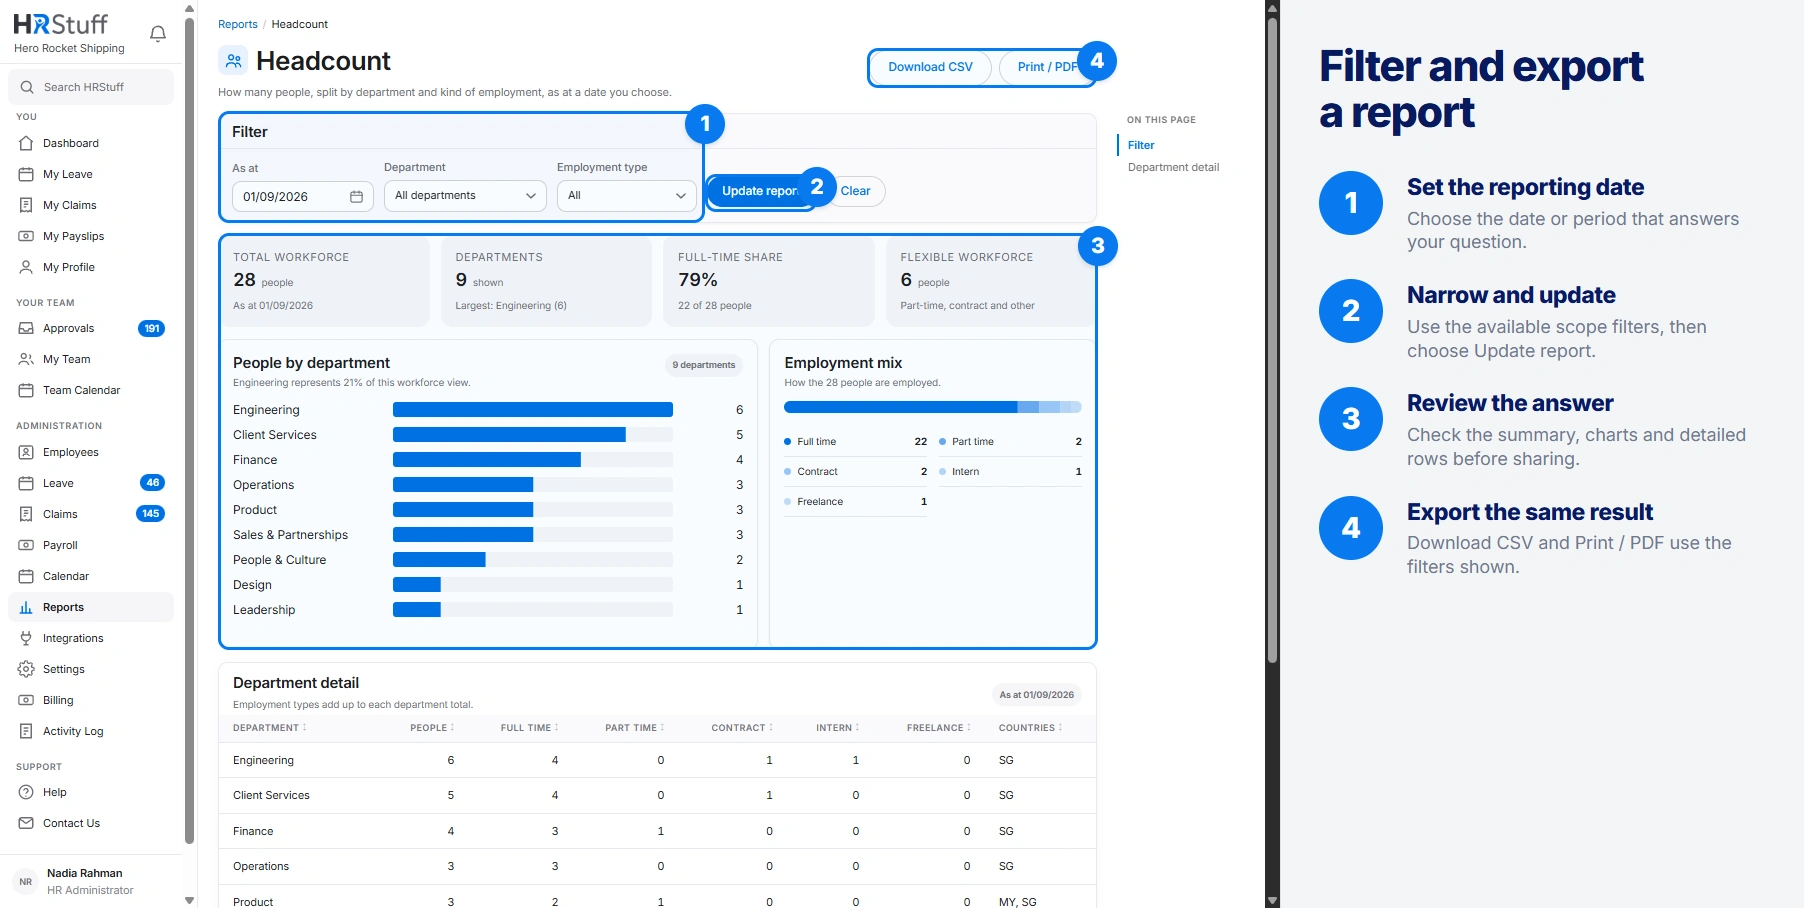
Download the filtered CSV
Choose Download CSV, Download or Download checklist. HRStuff uses the selected filters and exports every matching row, not only the rows currently visible on screen.
The file begins with the report and company name, followed by Filters, the method Note and any Warning. It then includes the headline figures, column headings, all result rows and the totals line. This context stays with the figures after the file leaves HRStuff.
The CSV is UTF-8 for names and text used in Excel and other spreadsheet programs. Keep the first context lines when sharing the file so another reader can tell what was included.
Print or save a PDF
Choose Print / PDF or Print
A clean page opens with the company name, report title, filters, method note, warnings, summary and the same table.
Choose Print or save as PDF
Your browser opens its print window. Choose a printer or Save as PDF, then confirm the action there.
Check the first page
Make sure the filters and any warning are visible before distributing the document.
Keep report output accountable
Opening, downloading and printing are separate recorded actions in the company Activity Log. The entry identifies the report and the filters used.
A CSV or PDF is outside HRStuff’s access controls after download. Store it in an approved location, share it only with people who may see the underlying records and remove unneeded copies according to company policy.