
Approve or reject claims
Open receipts, check policy limits and add an optional employee-visible decision note when needed.
What this guide helps you do
Approvals shows claims you are currently allowed to decide. A manager sees eligible claims from direct reports within the manager amount limit. HR administrators can decide company claims, including those above that limit.
Review the actual expense and supporting evidence before choosing Approve or Reject. Use View when the table does not contain enough context.
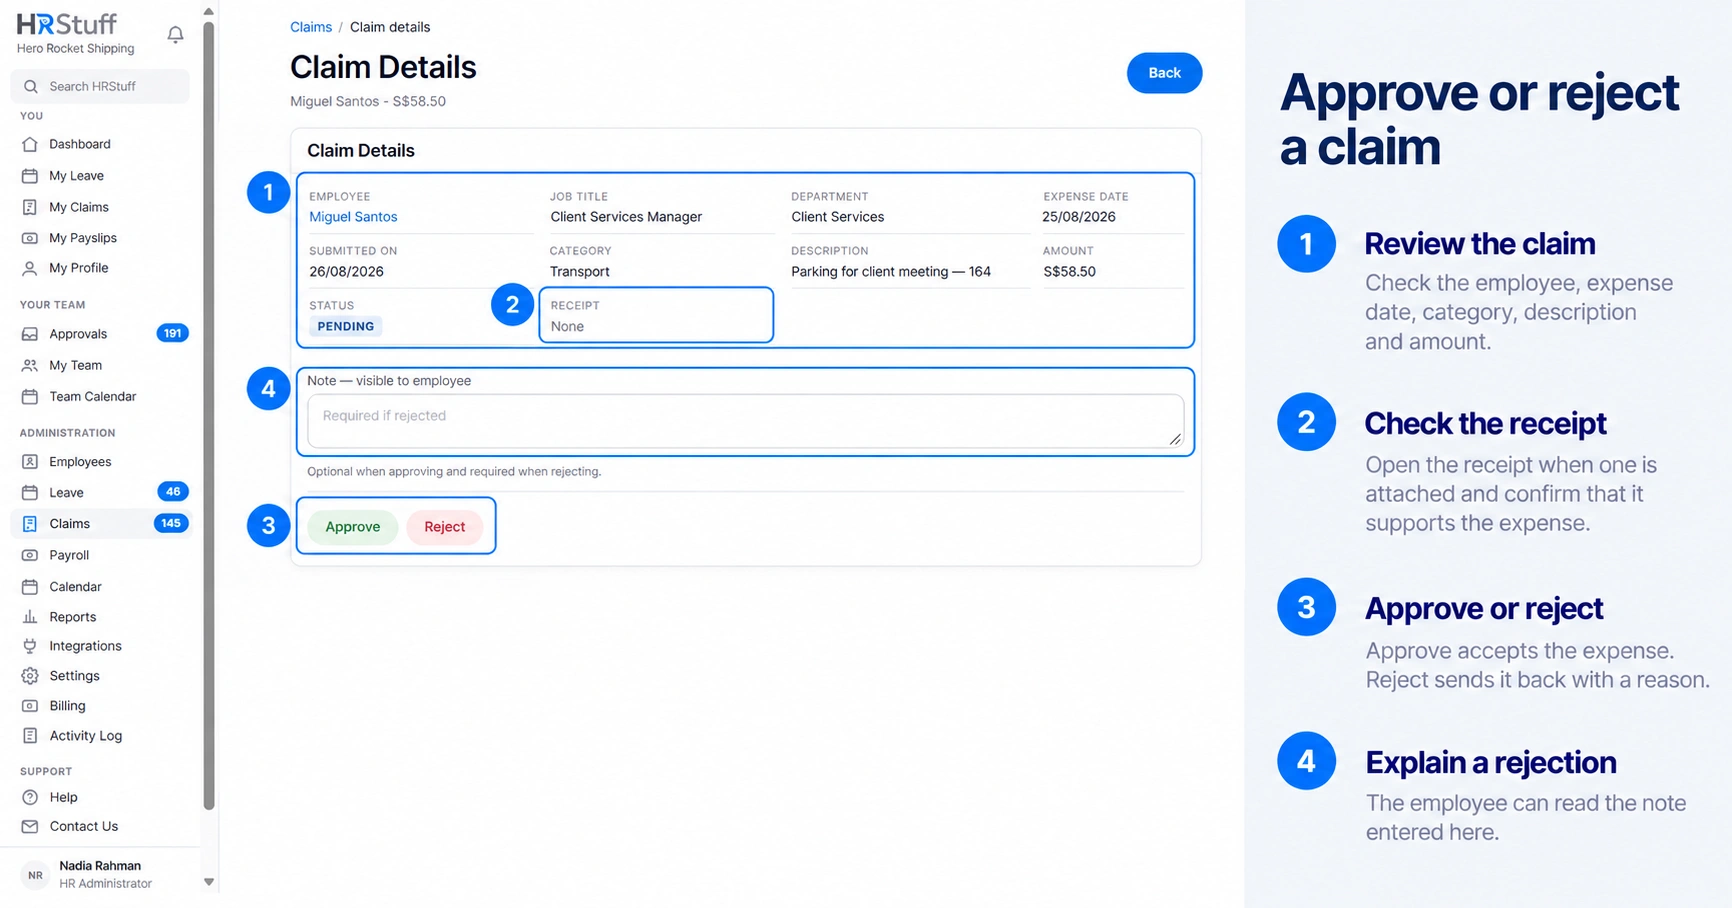
Review the claim
Confirm the employee and expense date
Make sure the expense belongs to the person and period you intended to review. Submitted on is separate from the day the money was spent.
Read the category and description
The description should explain the business purpose. The category groups the claim for reports. It affects automatic approval only when the company uses employee limits for that category.
Check the amount and currency
The claim stores the currency that applied when it was submitted. Look for a decimal-place mistake before approving.
Open every receipt
Check that each photo or PDF is readable and supports the amount and purpose. A required-receipt setting guarantees at least one attachment, not that the attachment is correct.
Check company policy and possible limits
Employee category limits can determine whether a claim is approved automatically. Company category limits only alert HR. A valid claim may therefore appear for manual review after it exceeds an employee limit.
Record the decision
Approve changes a still-pending claim to Approved and tells the employee. It does not move money.
Reject changes the status to Rejected. If you entered a decision note, the employee can see it.
HRStuff records the person and time of the decision in the claim and Activity Log.
If somebody else decided or cancelled the claim first, HRStuff keeps that newer status and asks you to refresh.
Decide several claims safely
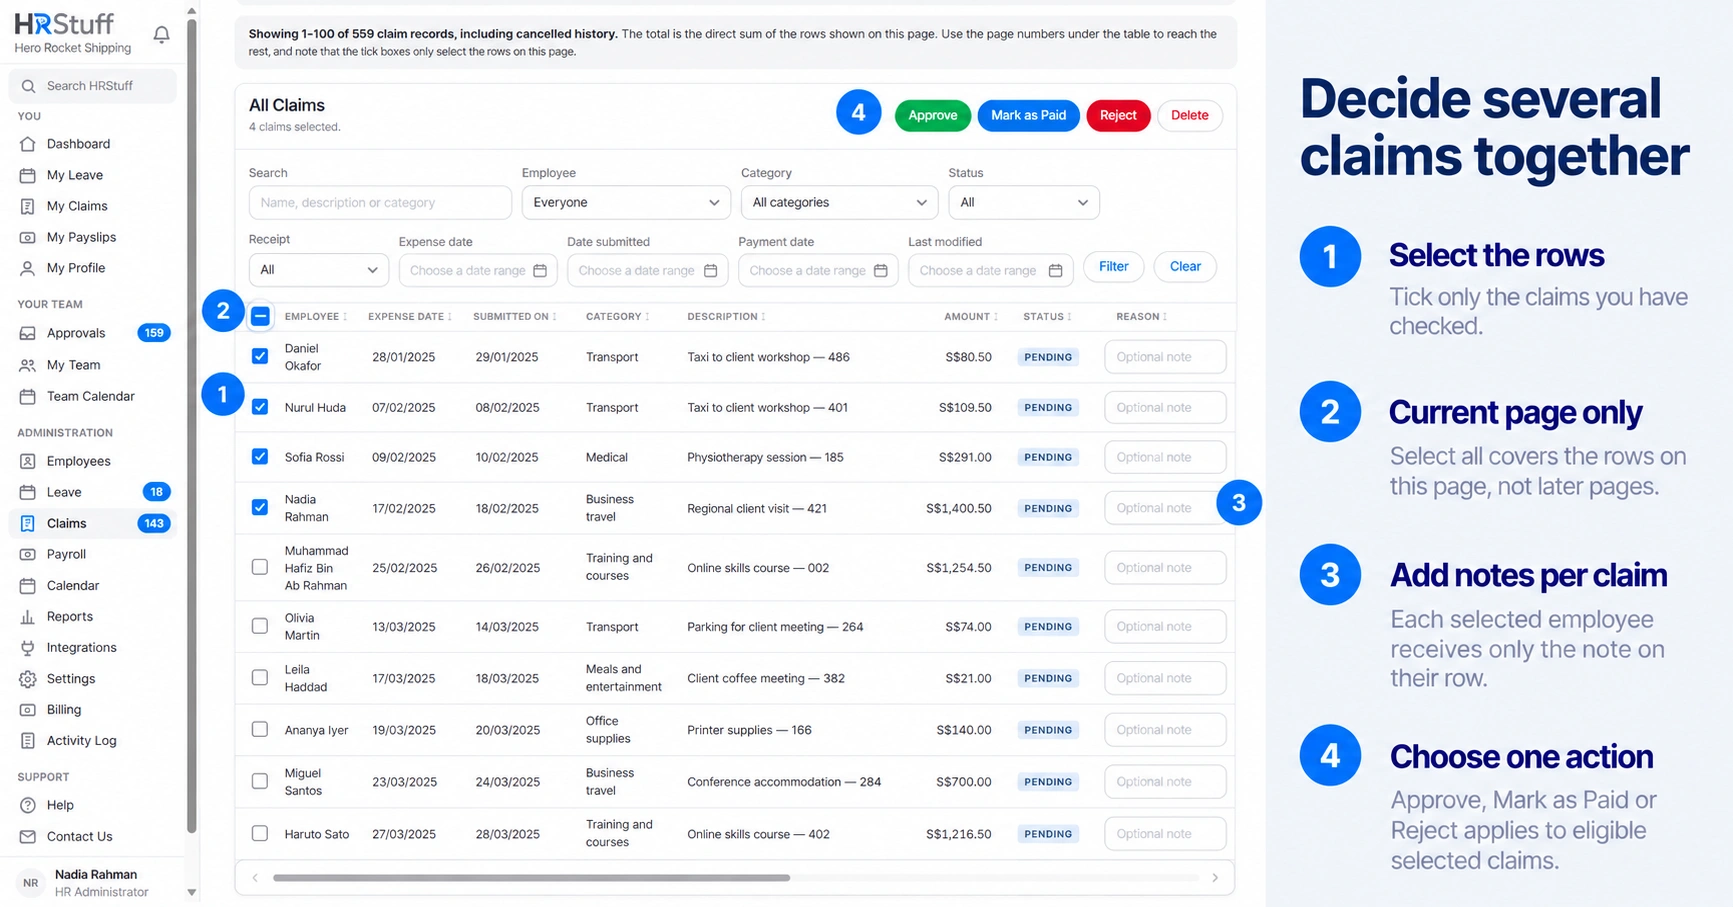
Tick the reviewed rows and choose Approve Selected or Reject Selected. Select all covers the current page, not every filtered result on later pages. Each selected claim can have its own optional note.
The Total row beneath the table is the direct sum of every claim shown on that page. It is a checking figure for the visible rows, not the amount selected by the tick boxes and not a hidden company-wide total.
Leave a complicated row unticked and open it separately.
If only some selected claims are changed, HRStuff lists every claim left unchanged and explains why. Check that list before treating the batch as complete.
Only pending claims are approved or rejected. Other selected statuses are left for the action that applies to them.
If a claim is missing from your Approvals list
The employee may not report directly to you.
The claim may be above the manager limit and therefore waiting for HR.
The company may route all claims directly to HR.
Approval delegation may have sent it to the manager above an absent approver.
It may already be approved, rejected, cancelled or paid.